Have you ever been driving through the neighborhood and seen a holiday scene in someone’s window and wondered, “How did they do that?” It is very easy to turn your window into a holiday scene your neighbors will love using window projection. Whether you are decorating for Halloween, Christmas, or another holiday, a simple window projector can make your house feel festive without a lot of complicated setup. I’ll show you the basic supplies, the setup, and a few examples of how the window projection looks once it is running.
How to Create a Window Projection Scene
You only need a few things to create your holiday window projection scene, and the setup is very simple once you understand how it works. The main idea is to project a digital holiday scene onto a white surface inside your window so it can be seen clearly from outside your home.
The main supplies are a white covering for the window, a projector, and the holiday scene you want to display. Once you have those pieces, you can use the same basic setup for Halloween, Christmas, or any other holiday where you want to add a little extra magic to your decorations.
White Disposable Tablecloth
You will need a white covering of some sort to cover the window or area where you want to project the scene. I have a very large dining room window that we like to turn into a holiday display, and I use a very thin white tablecloth that is 54″ x 108″.
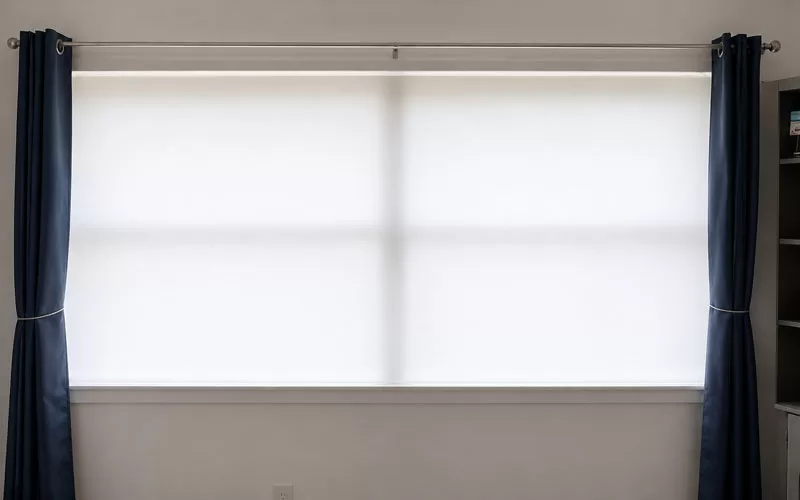
A white disposable tablecloth works well because it is thin enough for the projection to show through but still gives the scene a clean surface. It is also inexpensive, so you can replace it easily if the tape pulls or it gets wrinkled after a few uses. I purchased a 6-pack of disposable tablecloths for only $9.99.
Good Quality Projector – YABER
Of course, you will also need a projector. I had a cheap projector that worked fine for some Halloween scenes, but I wanted my Christmas window projection to look crisp and clear from outside, so I decided to purchase a better-quality projector.
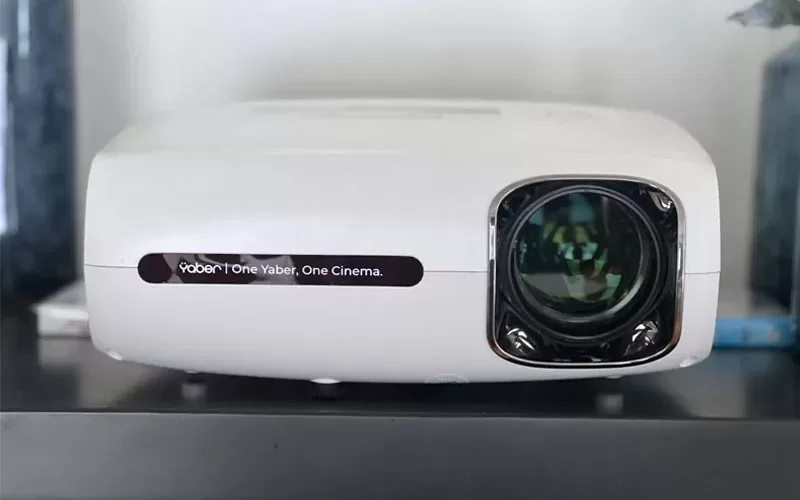
The YABER Pro V7 projector I originally purchased is no longer available, but there are newer YABER projector options that would work for a similar setup. The main things I would look for are good brightness, clear picture quality, and the ability to use a USB drive if you plan to play digital holiday scenes.
A better projector is not required to get started, but it does make a difference if you want your window projection scene to look bright and easy to see from the street.
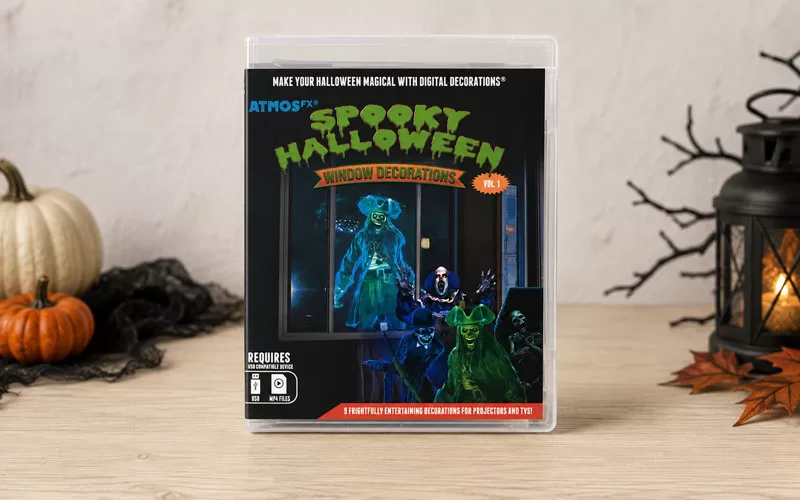
AtmosFX Digital Scenes
The last thing you will need is the holiday scene you want to project on your window or wall. I highly recommend AtmosFX for holiday scenes because they have a lot of options for Halloween, Christmas, and other seasonal displays.
I have purchased a couple of different products from them, and our first Halloween scene for this window projection project was “Spooky Halloween.” It was easier for me to purchase the USB version so everything was formatted correctly and I could just plug it into the projector.
You can also use the same basic window projection setup for different holidays by changing the digital scene. That is one of my favorite things about this project because the main supplies stay the same, but the look can change completely from season to season.
Setting Up the Window Projection
Once you have your supplies, the setup is very easy. Hang the white tablecloth over the window from the inside of your home, making sure it covers the full area where you want the scene to appear.
Since I use a very thin disposable tablecloth, I find that Gorilla Tape works best to hold it securely in place. You want the covering to be as smooth as possible so the projection looks clean from outside.
Then place your projector across the room and adjust the height, angle, and focus until the scene fills the window the way you want it to. I recommend testing it after dark so you can see exactly how it looks from the street. The AtmosFX window projection scenes are set to loop. If you have any issues getting the scenes to play, I would first check your projector manual and then the help articles at AtmosFX. I had no problems getting my window projection scenes to play.
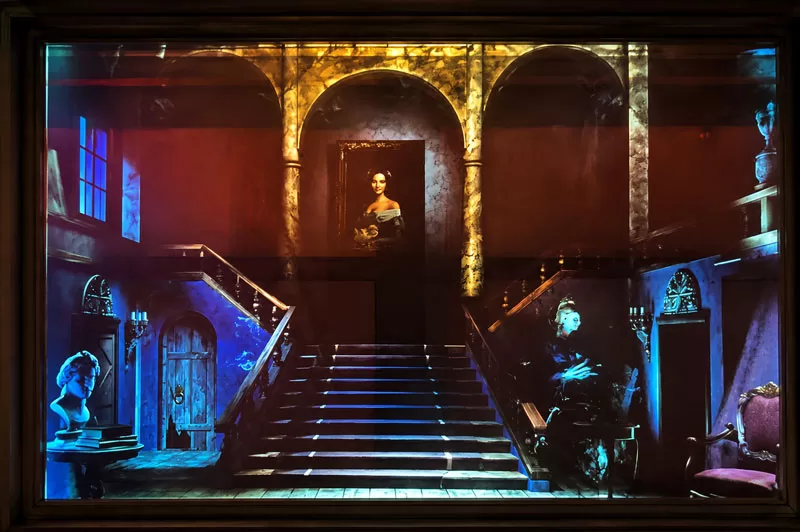
Hall of Haunts Window Projection
I wanted to display different scenes this year, so I went directly to AtmosFX and purchased an instant download product. The scene shown below is their digital product called “Hall of Haunts.”
I was able to download the window projections instantly, put them on a USB, and use them right away. This made it easy to change the look of the window without having to buy a completely new setup.
This is a fun option if you like switching up your Halloween decorations each year. It gives the house a spooky look from the outside, and it works well with other simple seasonal touches like mason jar Halloween crafts or porch decorations.
Adding Sound to the Projection
If you want to take your Halloween window projection one step further, you can add sound as well. I have a Bluetooth speaker that I can place outside the window so trick-or-treaters get the full effect of the scene, spooky sounds and all.
I have not set it up yet this year, but it is a fun option if you want the display to feel even more realistic. Just make sure the volume is loud enough to enjoy nearby without being too much for the neighborhood.
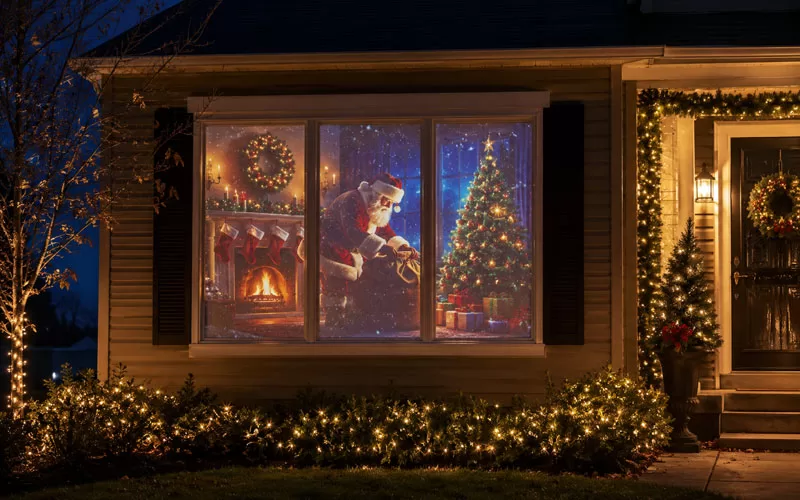
Christmas Window Projection Scene
As I mentioned, I wanted the newer projector so my Christmas window projection scene would look nice and crisp from outside. I get a lot of compliments at both Halloween and Christmas, and this setup has become one of my favorite ways to decorate for the holidays.
For Christmas, I decided there was really only one scene I loved, and that is one nice thing about purchasing directly from AtmosFX. You can purchase one scene if you do not want the full bundle package.
The Christmas scene I purchased is called “All Through the House,” and it gives the window that cozy holiday feeling without needing to add a lot of extra decorations.
A Simple Way to Make Your Windows Feel Magical
A holiday window projection is one of those decorations that looks much harder than it really is. Once you have the projector, a white covering, and the scenes you want to use, you can create a fun display for Halloween, Christmas, or any holiday you want to celebrate.
I love that the same basic setup can be used again and again just by changing the digital scene. It is simple to set up, easy to change from season to season, and always gets attention from the neighborhood.