Creamy, cool, and full of bright citrus flavor, these no-bake key lime pie bars are the kind of dessert that feels made for a warm Florida day. A buttery graham cracker crust gives each bar a little crunch, while the smooth Key lime filling delivers that familiar balance of tart lime and sweetness without requiring any time in the oven.
Key lime pie has long been associated with the Florida Keys, where stopping for a slice is practically part of the experience. Even VISIT FLORIDA includes Key lime pie among the foods closely tied to the Keys. Turning those familiar flavors into bars makes the dessert easier to portion and serve while keeping the combination of citrus, creaminess, and graham cracker crust that makes Key lime desserts so good.
This is also a great recipe when you want something homemade without spending much time in the kitchen. Most of the work happens in the refrigerator, making these bars an easy choice for summer parties, pool days, cookouts, or weekends when you want dessert waiting in the fridge. That same fresh-fruit approach works especially well in warm-weather desserts like my Florida blueberry cobbler, although these chilled Key lime bars have the advantage of keeping the oven completely out of the equation.
Why You’ll Love These No-Bake Key Lime Pie Bars
There is something especially refreshing about a chilled citrus dessert when the weather is hot. The filling in these bars is rich enough to feel indulgent, but the Key lime juice keeps the flavor bright so they don’t feel overly heavy. The graham cracker crust adds just enough texture to balance the creamy filling, and a little whipped cream and lime zest on top makes them look finished without requiring elaborate decorating.
They are also practical. You can make the entire pan the day before you need it and leave it chilling overnight, which means there is nothing to bake or assemble right before serving. Once firm, the bars can be cut into individual squares and arranged on a platter alongside other easy handheld treats, such as S’Mores Pizza Squares made with Golden Grahams, when you want a dessert table with a little variety.
A few reasons this recipe works especially well for summer:
- No oven is required.
- The bars can be prepared a day ahead.
- An 8×8-inch pan creates thick, satisfying squares.
- Key lime gives the filling a fresh sweet-tart flavor.
- Individual bars are easier to serve than slices of pie.
- Simple garnishes make them pretty enough for entertaining.
What Makes Key Lime Pie Bars Different from Key Lime Pie?
The biggest difference is the way the dessert is structured and served. Traditional Key lime pie is typically made in a round pie crust and sliced into wedges. These no-bake Key lime pie bars use many of the same familiar flavors but are assembled in an 8×8-inch pan and cut into squares after chilling.
The filling is also designed specifically for a no-bake dessert. Cream cheese gives it body, while sweetened condensed milk provides sweetness and the creamy base associated with Key lime desserts. Freshly whipped cream is folded into the mixture to keep the filling smooth and light enough to contrast with the graham cracker crust.
The result falls somewhere between Key lime pie and a chilled cheesecake bar. You still get the unmistakable lime-and-graham-cracker combination, but the thicker square shape makes the bars easier to portion for a dessert table.
Key Lime Juice: Fresh or Bottled?
Fresh Key limes are wonderful when you can find them, but because they are much smaller than the limes commonly sold in grocery stores, squeezing enough juice for a dessert can take some time. Bottled Key lime juice is a convenient alternative and works very well in this recipe.
One of the most familiar options is Nellie & Joe’s Famous Key West Lime Juice. Their traditional Key lime pie recipe also pairs sweetened condensed milk with 1/2 cup of Key lime juice, which is the same amount used in these bars.
| Option | Best For | What to Expect |
|---|---|---|
| Fresh Key lime juice | When Key limes are readily available | Fresh citrus flavor, but more limes to squeeze |
| Bottled Key lime juice | Convenience and consistent flavor | Easy to measure and available year-round |
| Regular fresh lime juice | When Key lime juice isn’t available | Still delicious, although the flavor will be slightly different |
For the easiest version, bottled Key lime juice paired with fresh lime zest gives you plenty of bright citrus flavor without requiring a pile of tiny Key limes.
Why Chilling Time Matters
The refrigerator is doing the work that the oven normally would in a baked dessert, so chilling time isn’t something to rush. The filling needs time to become firm enough to hold its shape when the bars are lifted from the pan and sliced.
Plan on at least six hours in the refrigerator, although overnight is even better. The extra time allows the filling and crust to settle together and makes cutting clean squares much easier. If you are preparing these for a party, making them the evening before is probably the simplest option because they’ll be completely chilled and ready to garnish the following day.
Resist the temptation to cut into them after only an hour or two. The flavor will still be good, but you’ll be much more likely to end up with a creamy Key lime dessert on a plate instead of neat bars.
Tips for Getting Clean, Firm Bars
Because these bars aren’t baked, a few small details can make a noticeable difference when it is time to slice and serve them.
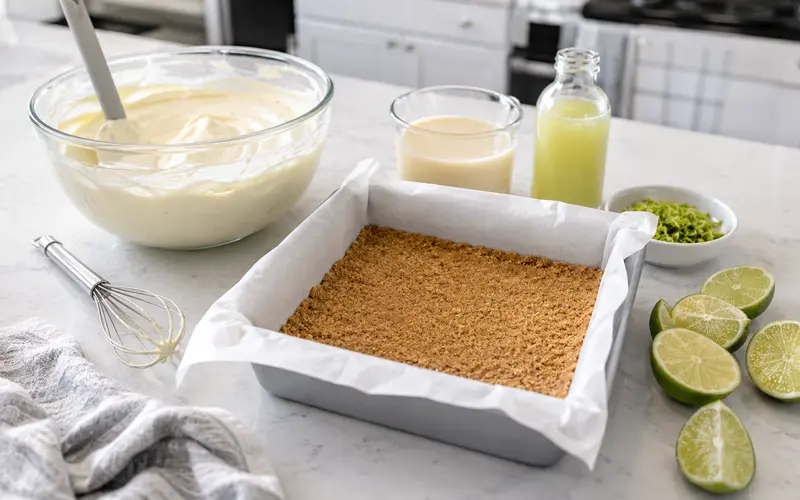
- Line the pan with parchment paper and leave an overhang on two sides so the entire dessert can be lifted out once chilled.
- Press the graham cracker crust firmly into the pan. The bottom of a measuring cup works well for creating an even, compact layer.
- Start with softened cream cheese so it blends smoothly without leaving small lumps in the filling.
- Whip the heavy cream until stiff peaks form before gently folding it into the Key lime mixture.
- Give the bars the full six hours of chilling time, or refrigerate them overnight when possible.
- Use a sharp knife and wipe the blade clean between cuts for cleaner edges.
- If the bars are still a little softer than you would like, place the pan in the freezer for about 20 minutes before slicing.
Once they’re cut, keep the bars refrigerated until you’re ready to serve them. They taste best cold, and the chilled temperature also helps them maintain their square shape.
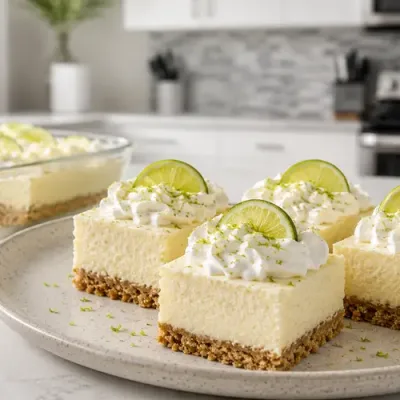
No-Bake Key Lime Pie Bars with Graham Cracker Crust
Ingredients
Graham Cracker Crust
- 1 ½ cups graham cracker crumbs
- 2 tablespoons granulated sugar
- 6 tablespoons unsalted butter melted
Key Lime Filling
- 8 ounces cream cheese softened
- 1 14-ounce can sweetened condensed milk
- ½ cup Key lime juice
- 1 tablespoon finely grated lime zest
- 1 cup cold heavy whipping cream
- 2 tablespoons powdered sugar
- ½ teaspoon vanilla extract
Optional Garnish
- Whipped cream
- Fresh lime zest
- Thin lime slices
Instructions
- Line an 8×8-inch baking pan with parchment paper, leaving enough overhang on the sides to lift the bars from the pan.
- Combine the graham cracker crumbs, granulated sugar, and melted butter in a medium bowl. Stir until the crumbs are evenly moistened.
- Press the mixture firmly and evenly into the bottom of the prepared pan. Refrigerate the crust while preparing the filling.
- Beat the softened cream cheese in a large bowl until completely smooth. Add the sweetened condensed milk and beat until creamy and well combined.
- Add the Key lime juice and lime zest. Mix until smooth. The filling will begin to thicken as the lime juice combines with the sweetened condensed milk, which is also the basis of established no-bake lime pie recipes.
- In a separate bowl, beat the cold heavy whipping cream, powdered sugar, and vanilla until stiff peaks form.
- Gently fold the whipped cream into the Key lime mixture until evenly combined, taking care not to deflate the whipped cream.
- Spread the filling evenly over the chilled graham cracker crust and smooth the top.
- Cover and refrigerate for at least 6 hours, preferably overnight, until completely firm.
- Use the parchment paper to lift the chilled dessert from the pan. Cut into 16 squares with a sharp knife, wiping the knife clean between cuts for neat edges.
- Garnish with whipped cream, lime zest, or thin lime slices just before serving, if desired.
Nutrition
Nutrition information has been calculated using an autogenerating online calculation and is intended for informational purposes. For accurate nutritional information, you should calculate the nutritional information with the actual ingredients used.
Easy Ways to Garnish and Serve Them
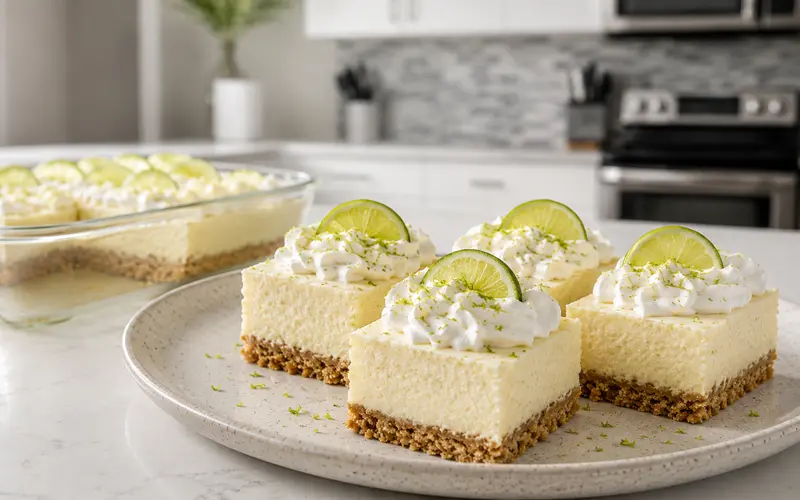
Key lime pie bars don’t need much decorating because the pale filling and golden crust already make a pretty combination. A small swirl of whipped cream, a sprinkle of fresh lime zest, and a thin lime slice are enough to give each square a polished look.
For a casual dessert, you can skip individual garnishes and simply spread or pipe a little whipped cream across the top before cutting the bars. For a party, decorating each square separately makes them easier to arrange on a serving platter and gives guests individual portions they can grab without cutting dessert at the table.
If you’re putting together a larger summer dessert spread, mixing citrus with another cool fruit flavor works especially well. Something creamy like homemade strawberry cheesecake ice cream gives guests a completely different flavor while still fitting the same cold, refreshing summer theme.
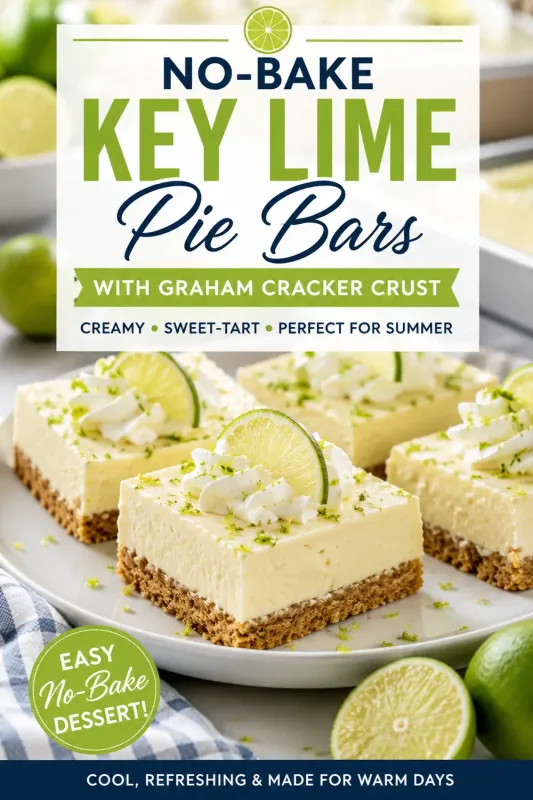
Love these no-bake Key lime pie bars? Save this recipe to Pinterest so you can easily find it the next time you need a cool, refreshing dessert.
How to Store Key Lime Pie Bars
Store leftover Key lime pie bars covered in the refrigerator rather than leaving them at room temperature. The USDA recommends refrigerating moist bars such as cheesecake and lemon bars. Because these bars contain freshly whipped cream, I would plan to enjoy them within about three to four days for the best texture and appearance.
You can leave them in the original pan and cover it tightly, or transfer individual squares to an airtight container. If you are stacking the bars, place parchment paper between the layers to protect the tops.
They can also be frozen if you want to keep them longer. Freeze the undecorated bars until firm, then wrap them well or place them in an airtight freezer container. Thaw them in the refrigerator and add whipped cream, zest, and lime slices afterward so the garnish stays fresh.