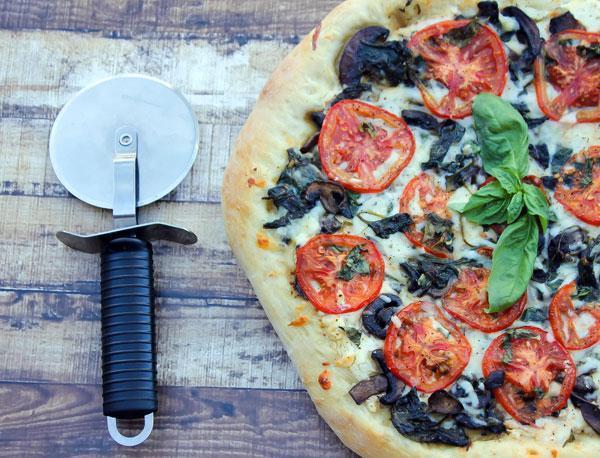
3 Cheese Italian Pizza Recipe
Author:
Ingredients
- Pizza Dough Ingredients:
- 500 grams flour, 00 ultra fine
- 325 grams water
- 10 grams table salt, (or 1 T Kosher salt)
- 3 grams active dry yeast
- Toppings Ingredients:
- 4 C Fresh Spinach
- 3 T Olive Oil
- 2 C Portobello Mushrooms
- 2 T Butter
- 3 cloves of Garlic -minced
- Fresh Basil
- 2 Large Tomatoes
- 1 C Ricotta cheese
- 3/4 C Fresh Parmensan cheese
- 2 C Mozzarella cheese
- Fresh basil
- Salt, pepper and garlic powder to taste
Instructions
Pizza Dough Directions:[br]
- Preheat Oven to 450 degrees
- Combine all ingredients in mixer at low speed until well-combined; about 2 minutes.
- Cover bowl and allow to rest for 20 minutes (autolyse).
- Then mix at medium speed for 5 to 6 minutes until smooth and silky.
- Turn out onto floured board and knead by hand for a few turns.
- Cut into four 7-ounce pieces.
- Cover and refrigerate overnight.[br]
Next day, remove from refrigerator for about 2 hours prior to using.[br]
- To make your pizza balls, shape each piece of dough into a ball.
- Gently roll your dough into a ball, then stretch the top of the ball down and around the rest of the ball, until the outer layer wraps around the other side.
- Pinch the two ends together to make a smooth ball with a tight outer “skin.”
- Set your ball seam-side down where it can rest.
- Dust your pizza balls with flour, and store them under a damp towel, in a proofing tray, or under plastic wrap.
- This will prevent the outside of the ball from drying out and creating a crust, and becoming difficult to work with.
- The top of the pizza ball should be soft and silky.
- Your pizza balls will need to rest for about an hour to become soft and elastic, so that they can be easily stretched into a thin crust pizza.[br]
If planning to use the dough on the same day it’s made, follow this procedure:[br]
- Once the dough is kneaded, place in lightly oiled bowl.
- Cover with plastic wrap and allow to rise at room temperature for about 3 hours.
- Turn out the dough onto lightly floured board.
- Using bench scraper, cut into 4 equal pieces.
- Gently round them, cover and allow to rise again for another hour.[br]
- Then they’re ready to use.[br][br]
Toppings Directions:[br]
- In a large pan place olive oil and fresh minced garlic, cook on medium heat for 2-3 minute, until you can start to smell the garlic,then add fresh spinach and cover. Stir occasionally until spinach is cooked down
- In another Large pan place 2 T of butter and washed Portobello mushrooms cook on med-high until mushrooms are soft.
- Slice 2 large tomatoes in thin slices. Chop up a few Basil leaves.
- Sprinkle flour on a large cutting board and roll dough with a rolling pin until desired thickness and size. Spray a pizza pan with cooking oil and place pizza dough on pan.
- Take the juice and oil from the spinach and spread on the edges of dough with a pastry brush.
- Spread Ricotta cheese over dough.
- Grade fresh Parmensan cheese over the Ricotta cheese
- Place mushrooms, spinach and basil on top of cheeses and then arrange the tomato slices on top.
- Shake salt, pepper and garlic powder over pizza to taste.
- Sprinkle Mozzarella cheese over the pizza evenly.
- Cook at 450 for approximately 25-30 minutes. Times vary depending on the oven so start checking on the pizza after 15-20 minutes.
